
You do not need to be flexible to do yoga; you need yoga to become flexible, and a stiff body is the normal starting point. This 15-minute morning routine uses eight poses that work for people who cannot touch their toes, sit cross-legged or bend backwards, with modifications for each and a chair option for the tightest days. Done four or five mornings a week, most beginners notice easier movement within two to three weeks and clear gains in hamstring and hip range in six to eight. The routine is laid out step by step below, with how to breathe through it, what progress looks like, and the mistakes that cause injuries in stiff beginners.
- Flexibility comes from regular, gentle stretching held for 20 to 40 seconds, not from forcing range.
- Bent knees, blocks and a strap are not cheating; they are how the poses are meant to be done at your current range.
- Mornings are stiffer than evenings. Warm up with movement before holding any stretch.
- Mild pulling is right; sharp pain, pins and needles or joint pain means back off.
- Consistency beats duration: 15 minutes most days outperforms an hour on Sunday.
Table of Contents
- 1 Why stiffness is not a barrier
- 2 Set-up and breathing
- 3 The 15-minute routine
- 3.1 1. Cat-cow (1 minute)
- 3.2 2. Child’s pose with wide knees (1 minute)
- 3.3 3. Low lunge with hands on blocks (1 minute each side)
- 3.4 4. Half split, bent knee (1 minute each side)
- 3.5 5. Downward dog with bent knees (1 minute)
- 3.6 6. Standing forward fold with bent knees (1 minute)
- 3.7 7. Seated figure four (1 minute each side)
- 3.8 8. Reclined hamstring stretch with strap (1 minute each side)
- 3.9 Finish (1 to 2 minutes)
- 4 Chair version for the tightest mornings
- 5 What progress looks like
- 6 Common mistakes
- 7 Who this is not for
Why stiffness is not a barrier
Flexibility is largely a matter of how much stretch your nervous system tolerates, not how long your muscles are. Regular exposure to a mild stretch teaches the body that the range is safe, and range expands. That is why a hamstring that will not let you reach past your knees in week one can reach your shins by week six with nothing but consistent, gentle practice. The NHS guide to yoga notes that beginners of any age and fitness level can start, and that the main benefits are strength, flexibility, balance and reduced stress. None of those requires being bendy at the outset.
Two rules keep stiff beginners safe. First, warm up before holding stretches; cold muscles resist and joints take the load. Second, work at the point of mild tension and breathe there. Pushing into pain triggers the protective reflex that tightens the muscle further.
Set-up and breathing
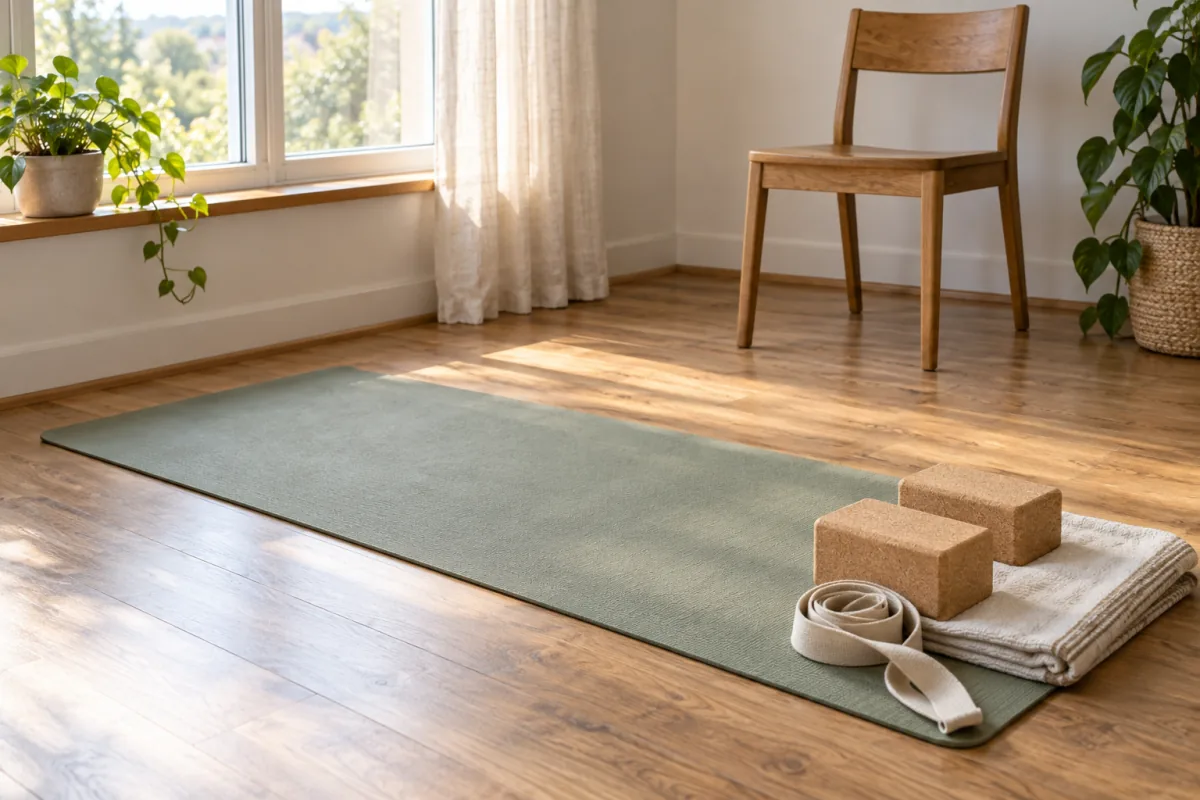
- Space: a mat or carpet, a wall nearby, and a sturdy chair.
- Props: two thick books or foam blocks, and a belt, scarf or towel as a strap. A folded blanket for the knees.
- Clothing: anything you can bend in. No shoes.
- Breathing: in and out through the nose, slower than normal. Exhale as you move deeper into a stretch; never hold your breath.
Hold each stretch for five to eight slow breaths, roughly 30 to 40 seconds. That is where the flexibility change happens.
The 15-minute routine
1. Cat-cow (1 minute)
On hands and knees, wrists under shoulders, knees under hips. Inhale and let the belly drop while the chest lifts; exhale and round the spine towards the ceiling. Move slowly for ten rounds. This warms the spine and is the reason nothing that follows should feel cold. Knees sore? Kneel on the folded blanket.
2. Child’s pose with wide knees (1 minute)
From hands and knees, take the knees wide, big toes together, and sit the hips back towards the heels. Arms forward, forehead down. If the hips will not go back, place a block or cushion between the calves and thighs and rest on it. This opens the hips and lower back without any hamstring demand.
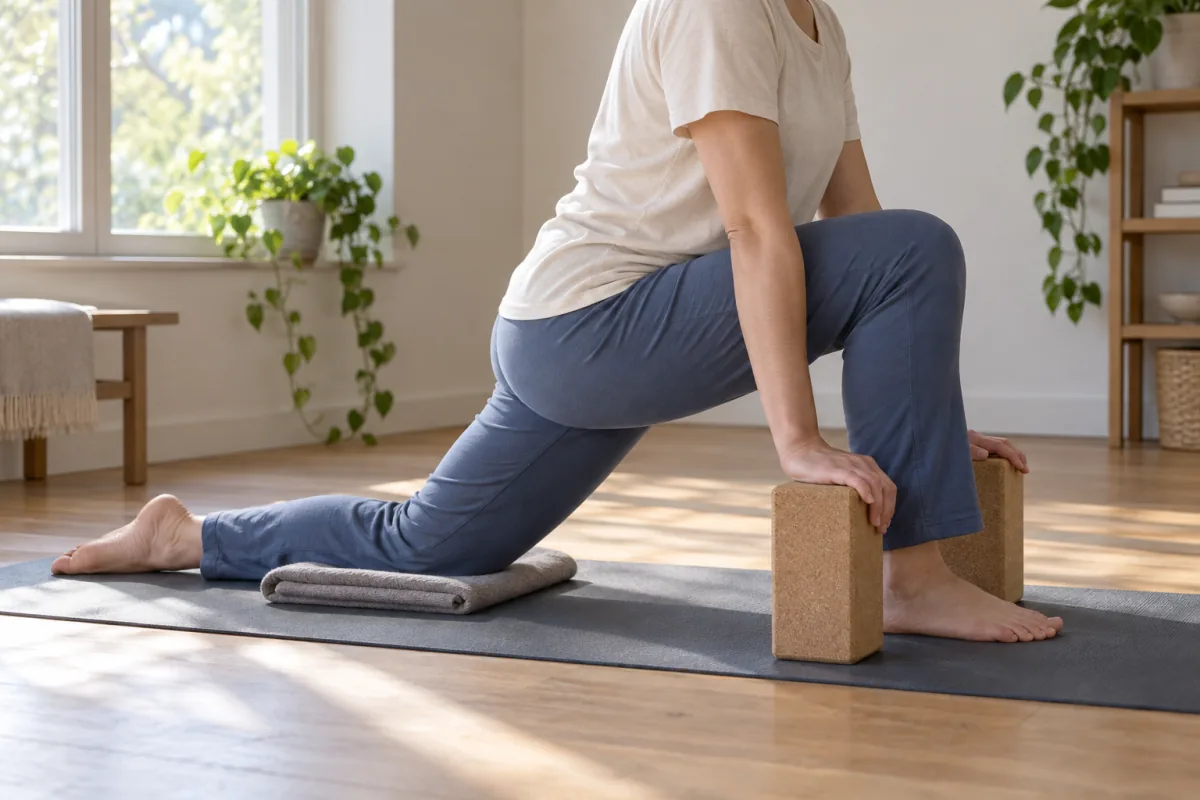
3. Low lunge with hands on blocks (1 minute each side)
Step the right foot forward between the hands, back knee on the blanket. Hands on blocks either side of the front foot so you are not collapsing forward. Let the hips sink until the front of the left hip feels a stretch. Keep the front knee over the ankle. This is the pose that targets the hip flexors shortened by sitting; expect it to be the most noticeable.
4. Half split, bent knee (1 minute each side)
From the low lunge, shift the hips back over the rear knee and straighten the front leg only as far as it goes without the back rounding. Foot flexed, hands on blocks. A bent front knee is correct if the hamstring is tight. Do not aim for the chest on the thigh; aim for a mild pull behind the knee and thigh.
5. Downward dog with bent knees (1 minute)
From hands and knees, tuck the toes and lift the hips up and back. Keep the knees bent generously and the heels off the floor. The priority is a long spine from wrists to hips, not straight legs. Pedal the feet slowly. If the wrists complain, do this with hands on the seat of the chair instead.
6. Standing forward fold with bent knees (1 minute)
Stand with feet hip-width apart. Bend the knees a lot, fold forward from the hips and let the arms hang or hold opposite elbows. The head is heavy and relaxed. Over weeks, straighten the knees a little at a time. Feeling this in the lower back rather than the hamstrings means the knees need to bend more.
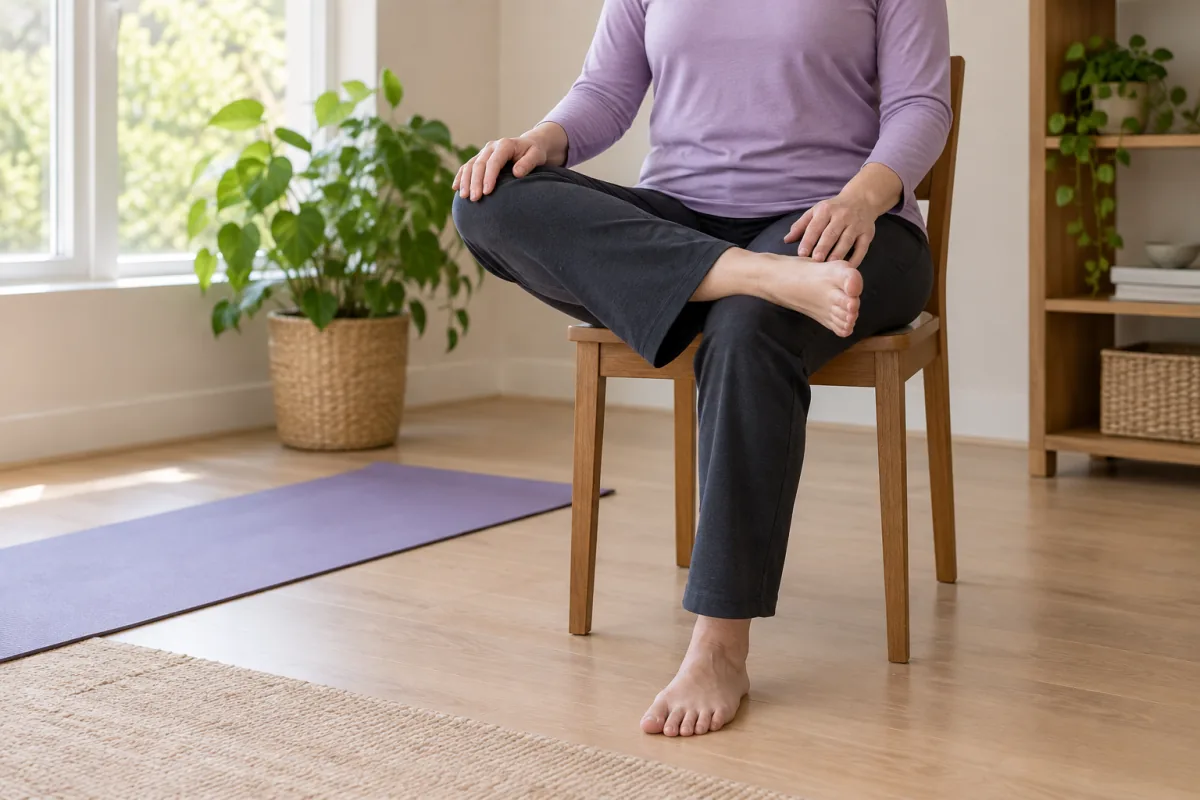
7. Seated figure four (1 minute each side)
Sit on the chair, or on the floor with the back against the wall. Cross the right ankle over the left knee, flex the right foot, and lean forward slightly from the hips until the right outer hip stretches. This reaches the deep hip rotators that make cross-legged sitting impossible for many adults.
8. Reclined hamstring stretch with strap (1 minute each side)
Lie on your back, loop the strap around the right foot, and raise the leg with the knee as straight as it comfortably goes. The left leg stays bent, foot on the floor. Hold the strap with relaxed arms and breathe. This is the safest hamstring stretch for stiff backs because the spine is fully supported.
Finish (1 to 2 minutes)
Lie on your back, knees bent or legs long, and take ten slow breaths. Notice which areas feel different from when you started.
Chair version for the tightest mornings
If getting down to the floor is hard, or you are travelling, the whole routine adapts to a chair:
- Seated cat-cow: hands on knees, arch and round the spine.
- Seated forward fold: feet wide, fold forward and let the arms hang between the legs.
- Seated lunge: sit sideways on the chair, one leg back with the knee bent towards the floor.
- Seated figure four as above.
- Standing hamstring stretch: heel on the chair seat, knee soft, hinge forward from the hips.
- Downward dog with hands on the chair back.
What progress looks like
| Timeframe | Typical change |
|---|---|
| Week 1 | Poses feel awkward; morning stiffness eases faster after the routine |
| Weeks 2 to 3 | Holds feel less intense at the same range; you start to sink slightly deeper |
| Weeks 4 to 6 | Measurable gains: fingertips a few centimetres closer to the floor, easier low lunge |
| Weeks 8 to 12 | Straighter legs in the fold and the hamstring stretch; daily movement feels easier |
Track one thing: how far your fingertips reach in the standing fold, measured against your shins, once a week. The Mayo Clinic’s overview of yoga points out that the stress-reduction benefits arrive well before the flexibility ones, so judge the routine on how you feel after it, not only on the tape measure.
Common mistakes
- Straightening the legs to look like the picture. Bent knees with a long spine is the correct version for a tight beginner.
- Skipping the warm-up and holding stretches cold, especially first thing in the morning.
- Bouncing. Static holds with slow breathing work; bouncing triggers the tightening reflex.
- Holding the breath. If you cannot breathe slowly in a pose, you are too deep.
- Doing an hour on Sunday and nothing all week. Frequency drives flexibility.
- Ignoring the hips and blaming the hamstrings. Tight hip flexors and rotators limit forward folds more than most people realise.
Sitting all day undoes a morning routine faster than anything else. Pair it with the stretches for desk workers during the day, and if your upper back and shoulders are the stiff part, the routine in how to fix rounded shoulders is the companion piece.
Who this is not for
This routine is gentle and suits most healthy adults, but check with a doctor or physiotherapist first if you have a current back injury, disc problems, sciatica, recent surgery, severe osteoporosis, or hip or knee replacements, since forward folds and deep hip stretches may need to be modified or avoided. Pregnant women should use a prenatal-specific routine. If a pose produces sharp pain, numbness, or pain that lingers afterwards, stop and get it assessed; discomfort from a stretch fades within a minute of releasing it. If you are also new to exercise generally, the gradual approach in how to start working out when completely out of shape pairs well with this routine. And if mornings bring anxiety along with stiffness, ending with the five-minute breathing exercises makes a good close.
Frequently asked questions
Can I do yoga if I cannot touch my toes?
Yes. Bent knees, blocks and a strap put every pose within reach. Touching your toes is a possible outcome of practice, not a requirement for starting.
How long until I get more flexible?
Noticeable ease in two to three weeks; measurable gains in hamstring and hip range in six to eight weeks with practice four or five mornings a week.
Is morning the best time for yoga if I am stiff?
Morning is the stiffest time, which is why the routine starts with movement rather than holds. It is also when a routine is easiest to keep. Evening practice gives more range but is easier to skip.
Do I need a mat or blocks?
A carpet, two thick books and a belt do the job. A mat helps grip in downward dog, and proper blocks are more stable, but neither is essential to begin.
Should stretching hurt?
No. Mild pulling tension that eases as you breathe is the target. Sharp, burning or joint pain means you have gone too far or the pose needs modifying.